Use this guide to look up a task. For installation and your first recording, follow Getting started. Sign-in, credits, and record management are covered in Account and data. All screenshots show the English interface.
Model management
Where and what you need: Models → Local models. Live recording and file transcription can use different defaults. Model cards list task support, languages, download size, and estimated memory use. Downloading requires internet; installed, usable models work offline.
- Choose a model that supports live transcription or file transcription, then select Download.
- Use Pause download to pause and Resume download to continue. Cancel download removes this download's temporary files, not installed models.
- After downloading and file checks, select Use and make the model the default for live recording, files, or both, as offered.
- Before deleting a model in use, switch its tasks to another model. Then select Delete model on the original version and confirm. Finish any active recording or transcription first.
What happens: New tasks use their selected default. Deletion removes only that model version's local files, not history or cloud records.
The cloud-model tab currently has no models. Configure AI text actions and their output language on AI Actions.
Live voice input
Both modes need a usable recording model, microphone, and system permissions. Local transcription does not require sign-in or AI credits. Check your microphone first.
| Mode | How to open it | Where text appears | Best for |
|---|---|---|---|
| Editor mode | Its shortcut, or the Home/floating microphone button when Editor is the default | Floating editor; text can be edited and copied | Reviewing text, running AI, or searching before using it. |
| Direct mode | Its shortcut, or the microphone button when Direct is the default | The selected destination text field | Writing directly into the app you are editing. |
Editor mode
- Use the Editor mode shortcut, or set Editor as the default and select the microphone button.
- Speak, then use the recording control to finish and wait for finalization.
- Edit the original text and copy it, or choose an AI action or search.
What happens: The original stays in the floating editor. AI output is shown separately and can be copied separately. Transcribing text alone does not automatically send an AI request.
Direct mode
Extra requirements: Your destination app must have an editable text field. If system permission is required, use Manage Direct mode permissions in Settings → Voice and shortcuts. On macOS, follow the prompts to allow Accessibility access too.
- Click the destination text field, position the cursor, and use the Direct mode shortcut.
- If prompted to select a text field, select the destination and wait for recording to start.
- Keep that input location while speaking; do not switch windows or text fields.
- Finish using the recording control or the matching shortcut, then check the inserted text.
What happens: Text is written to the locked destination. If insertion fails, check the field and permissions; use Editor mode to copy and paste if necessary. Do not retry repeatedly without a clear destination.
Home, the floating microphone, and the primary media button use your default mode. Each mode's own shortcut still selects that specific mode; changing the default does not merge the shortcuts.
Shortcuts and headset controls
Where to start: Settings → Voice and shortcuts.
| Platform | Initial Editor shortcut | Initial Direct shortcut |
|---|---|---|
| Windows | Alt+E | Alt+V |
| macOS | Control+Shift+E | Control+Shift+V |
| Linux | Alt+E | Alt+V |
These are initial values. Use the shortcuts currently registered successfully in Settings and shown on Home. An Unavailable label means the configured text is not proof of an active system binding.
- Edit the shortcut for the mode you want and press the new combination.
- Wait for saving and registration to finish. If it conflicts or is occupied, choose another combination rather than dismissing the warning.
- Test once from the destination app and confirm the intended mode opens.
- For headset or keyboard media buttons, enable headset controls, complete any permission prompts, and test the primary media button. If unavailable or unsupported, use a normal shortcut or microphone button.
What happens: A working shortcut can start voice input from another app. The primary media button uses the default mode. Linux desktop environments may restrict global shortcuts or media buttons; use the actual registration result on your system.
Transcribing audio files
Where and what you need: File transcription in the sidebar. Install a local model with file-transcription support first. No sign-in, AI credits, or microphone is needed.
| Limit | Current requirement |
|---|---|
| Formats | WAV, MP3, FLAC, OGG, M4A, MP4. |
| File size | Non-empty files, up to 2 GB each. |
| Batch size | Up to 100 files per selection. |
| Speaker separation | Unavailable in this version; only no speaker separation is offered. |
- Select Choose files or drag files into the page. Use Add more files to add more.
- Check the list under Prepare transcription. Remove files with invalid formats, sizes, names, or read states. Select a file again if it has changed externally.
- Choose a local model. If it lets you set Audio language, select a known language from the available choices. Automatic-only models detect the language themselves; review the transcript either way.
- Select Transcribe and watch each task progress through queued, reading, transcribing, and finalizing states.
- When complete, select View result, review the text, and choose Copy transcript.
What happens: Each file has its own task. With Save local records enabled, the finished text is saved in the current identity's local history. It is not automatically saved to the cloud.
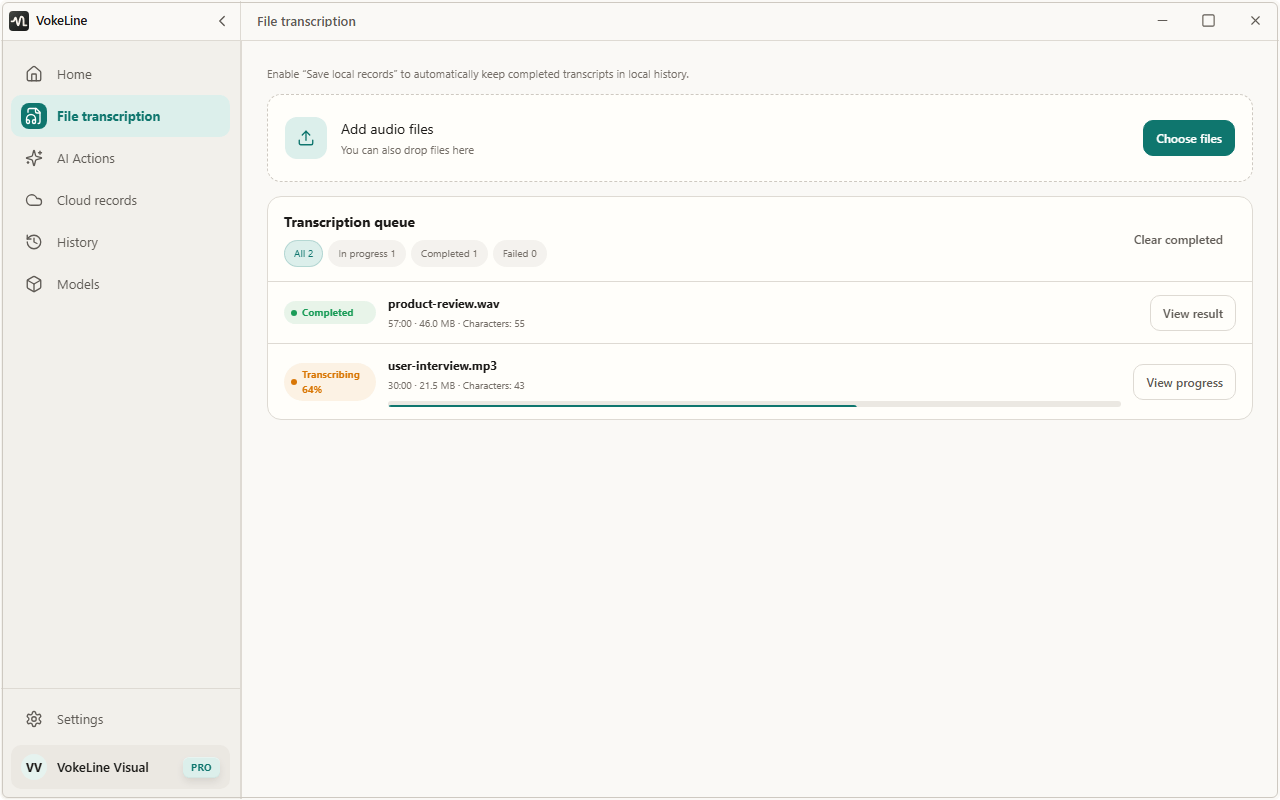
Queued tasks can be canceled; failed tasks can be transcribed again. Remove task and Clear completed tidy the task list; they do not delete saved local history or cloud records. A supported extension does not guarantee every encoding will decode. For damaged files, missing audio tracks, or decoding errors, see File-transcription problems.
AI text actions
Where and what you need: Configure actions in AI Actions; run them from the floating editor toolbar. Running an action needs sign-in, internet, an available AI service, and enough credits. Check the output language and credit information before execution.
| Action | Purpose | Output language |
|---|---|---|
| Explain | Explain the original text's meaning | Selected output language. |
| Polish | Improve expression | Original text's language. |
| Summarize | Condense the main content | Selected output language. |
| Key points | Extract the important points | Selected output language. |
| Proofread | Check and correct text | Original text's language. |
- Choose an output language on AI Actions, then save.
- Prepare the text in the floating editor and check the input limit.
- Choose an action, check its credit information, and wait for completion.
- Review and copy the result. Return to the original if you need to edit it.
What happens: Output appears in the result area. Text goes to the online AI service only when you actively run the action.
“Follow source language” uses the original text’s language. The “Polish” and “Proofread” actions always keep the original language.
“Retry” tries to recover the same operation. “Run again” starts a new operation and may spend credits again. If processing or result verification is still pending, read the status and wait before running another operation.
Manage frequently used actions
- Select an action in AI Actions; enable or hide built-in actions and adjust their order as needed.
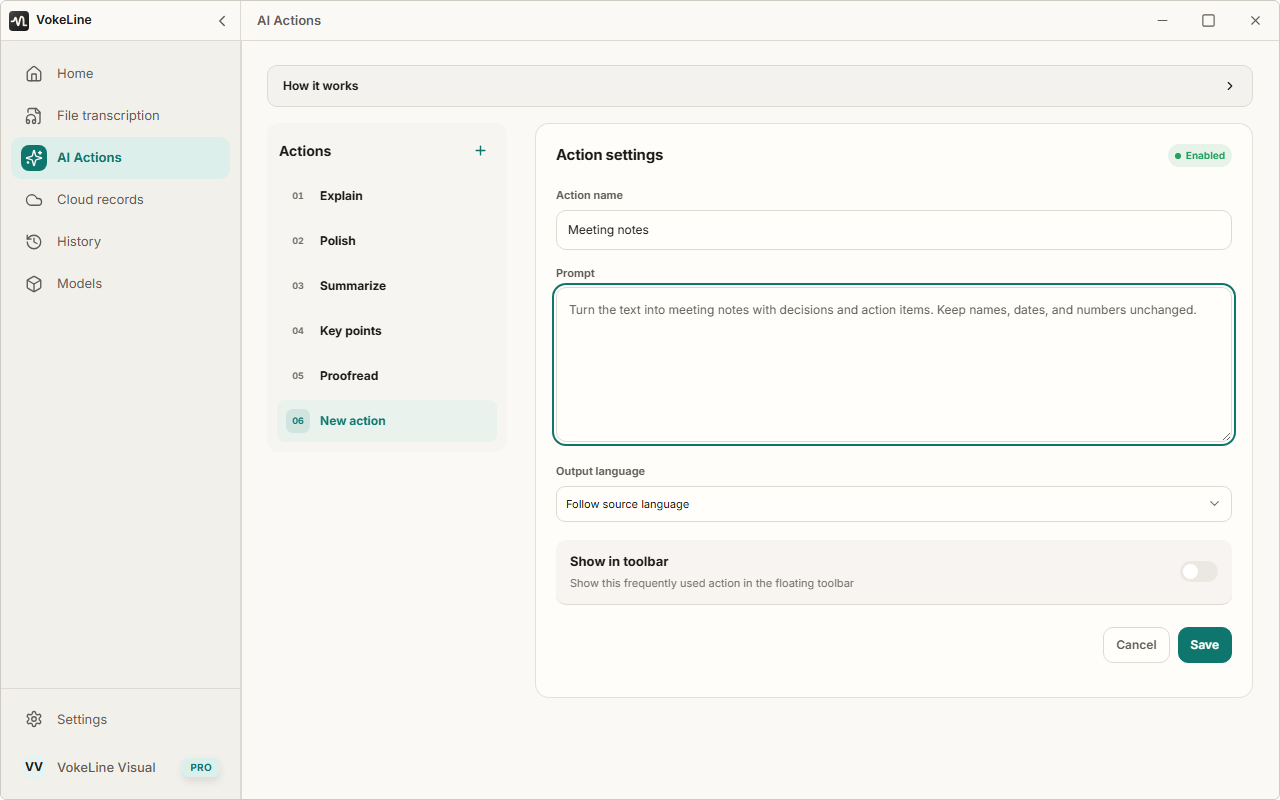
- Turn on Show in toolbar and save to place it on the floating toolbar.
- The toolbar holds up to 8 AI actions. Remove another action from the toolbar before adding one when the limit is reached.
What happens: Only selected actions appear on the toolbar. Hiding an action does not delete saved history.
If an action is not visible in the quick-action row, use its scroll arrows or open “More actions” to find other available actions.
Create or delete a custom action
- Select New action in AI Actions. Enter a name and prompt, such as “Turn the original into meeting notes with decisions and action items.”
- Set its language and toolbar visibility, then save. Do not put passwords, keys, or other sensitive information in prompts.
- Test with a short text and refine the prompt. You can create up to 20 custom actions.
- To remove it, select the custom action and choose Delete action. You must recreate it to use it again; previously saved results remain in their records.
What happens: A custom action runs with its saved configuration. If switching actions or leaving prompts you about unsaved changes, keep editing or explicitly discard them. An unsaved draft is not a new saved configuration.
Web search
Where and what you need: Search controls on the floating editor toolbar. Google, Bing, Baidu, and DuckDuckGo are available. No VokeLine sign-in or AI credits are required; accessing search results needs internet.
- Prepare your query in the editor and remove personal information you do not want sent to the search service.
- Choose a search engine to open its results in the system browser.
- Select and arrange your preferred entries in the toolbar's search settings.
What happens: The chosen service receives the query and supplies the results. Search does not create an AI result inside VokeLine or automatically save results as cloud records.
Language settings
| Setting | Where | What it changes |
|---|---|---|
| Interface language | Settings → General | Navigation, buttons, and messages. |
| Audio language | Detected automatically for recording; selectable for files when the model supports it | The language to recognize, not a translation into another language. |
| AI output language | AI Actions and the execution interface | Explain, Summarize, and Key points use your selection; Polish and Proofread follow the original. |
Live recording detects the language automatically, so use a model that supports your language. For files, you can set Audio language only if the model supports language selection. Changing the interface language changes neither recognition nor AI output language. Custom actions also depend on their saved configuration and prompt.
Stopping, collapsing, hiding, and quitting
| Action | What to do |
|---|---|
| Finish recording | Use the recording control and wait for finalization before copying or switching tasks. |
| Collapse the editor | Save or copy what you need first; the floating voice entry remains available. |
| Hide the floating window | Choose Hide in the close prompt; reopen from the tray, menu bar, or shortcut. |
| Quit the app | Finish the current task, then choose Quit from the tray or menu bar. |
Esc acts on the current state: it may close a popup, return to the original text, or collapse the editor. It does not always hide every window immediately. Complete any recording or save prompts before changing modes, collapsing, or closing. If that operation fails, confirm your text is still present before retrying.
Before quitting, copy any text you still need and make sure the records you want to keep have been saved. Text left only in the editor may be lost when the app exits.