Follow this guide in order for your first use. With a working local recording model and microphone, you can dictate without signing in or spending AI credits. Downloading the app and a model requires an internet connection; once the model is installed and ready, transcription can run offline.
Download and install
Where to start: Open the VokeLine download page. Choose the operating system and processor architecture that match your device, using the installers actually offered there.
- Download the matching package. Use the Windows installer on Windows; distinguish Apple Silicon from Intel on macOS; use the Linux package offered for Linux.
- Follow your system's installation prompts. For a macOS DMG, put the app in Applications. For a Linux AppImage, allow the file to run as a program before opening it.
- Launch VokeLine from your system's app list or the installation shortcut. Stay connected on first launch so you can download a model.
What happens: The main window shows Home and the navigation sidebar. Do not substitute another platform's package if yours is unavailable. For installation errors or system blocks, see Installation and updates.
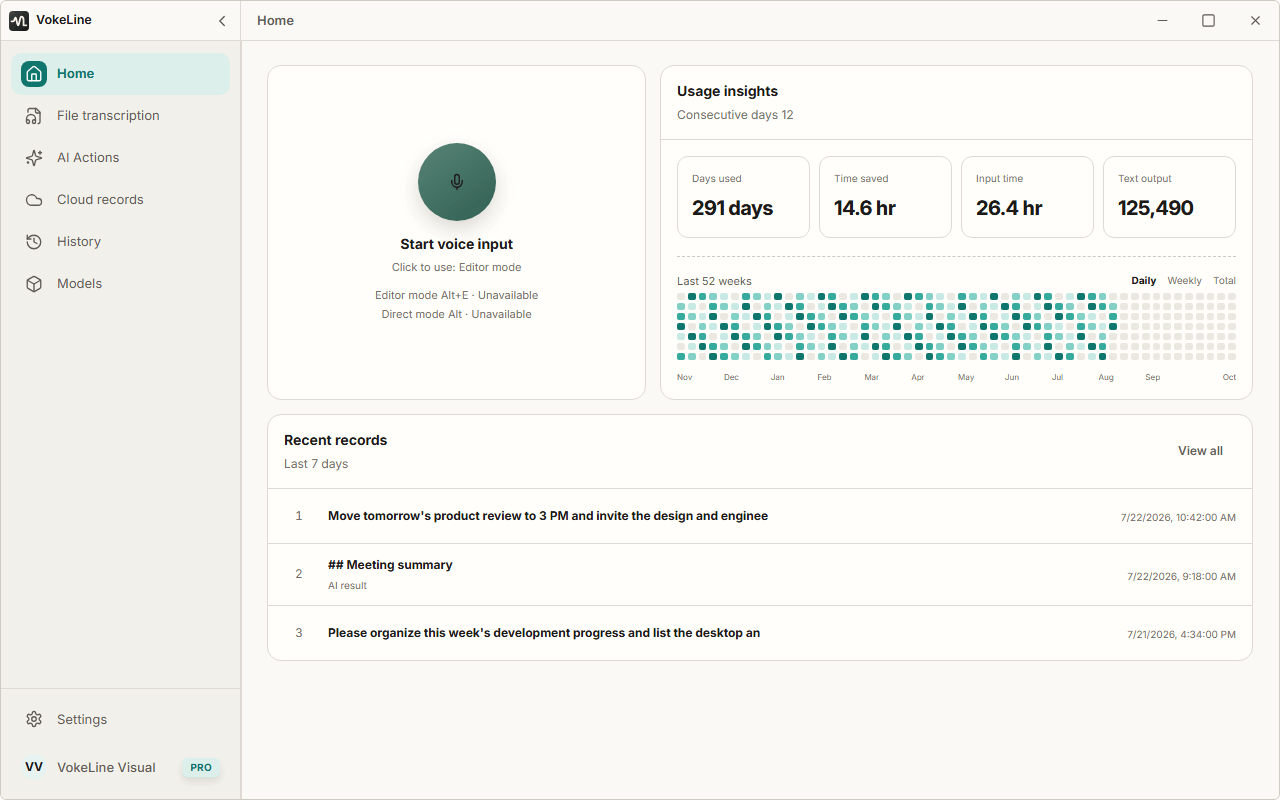
The screenshot uses the English interface. Home, Models, and Settings are the entry points used below.
Prepare your first model
Where and what you need: Open Models → Local models. Downloads need an internet connection and enough disk space. Each card lists its download size, estimated memory use, and supported tasks.
- Choose a model that supports live transcription, and check its languages and device requirements. A file-only model cannot be used for live recording.
- Select Download and wait for downloading, file checks, and installation to finish. Pause download if you need to disconnect, then Resume download when you are online again.
- Select Use on the installed model. If it supports both tasks, choose whether to make it the default for live transcription, file transcription, or both.
- Check that the card shows it is in use for live transcription before returning to Home.
What happens: New recordings use that local model. Finishing a download does not select the model for you: you still need to choose Use. For damaged files, insufficient memory, or download failures, see Model problems.
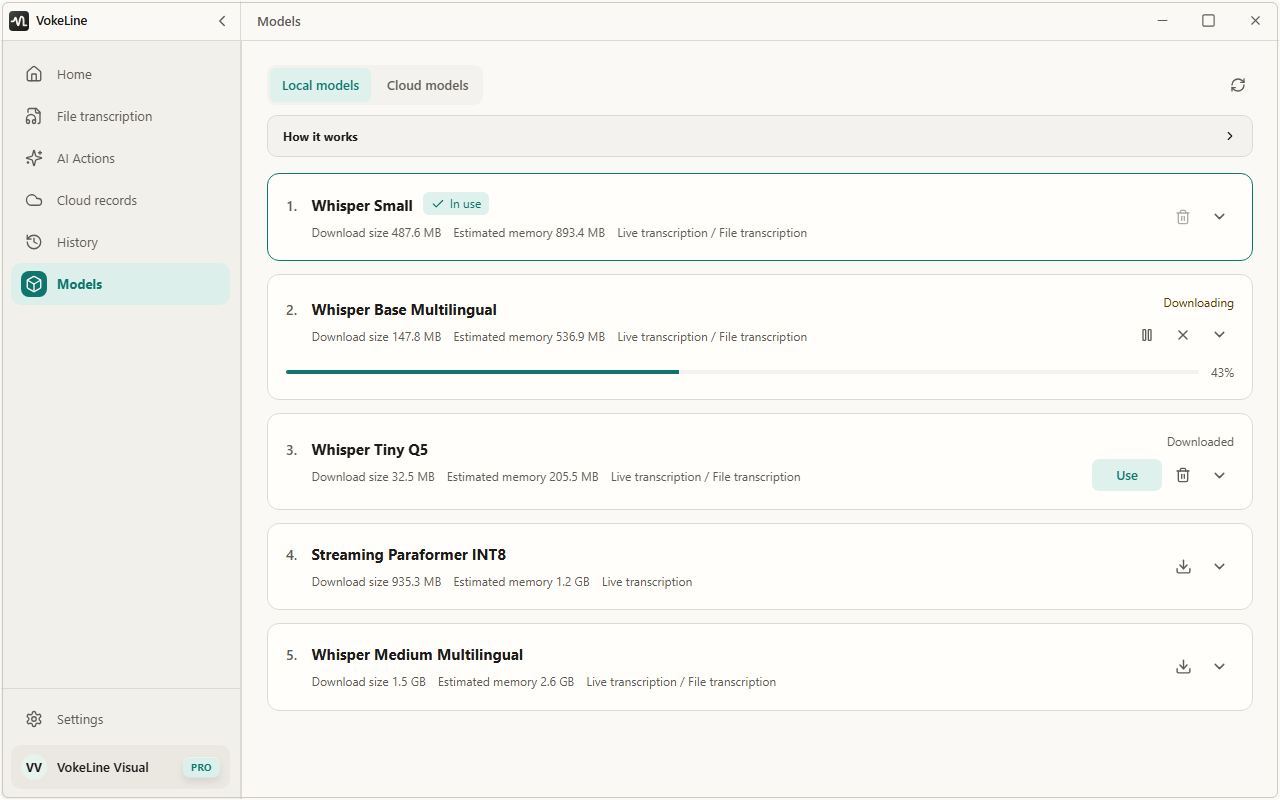
Model names and availability may differ from this example. For switching and deletion, see Model management.
Check your microphone
Where to start: Settings → Voice and shortcuts → Input device. Recording needs a connected, unmuted microphone and permission to use it.
- Choose the system default device or the specific microphone you want. If an external device is disconnected, select an available input again.
- Select Test microphone and say a few words. The test finishes automatically within 10 seconds and does not save this test recording.
- Continue once sound is detected. Otherwise check mute, system input volume, and your distance from the microphone, then test again.
- If permission is denied, use the microphone permission settings link. Open your system settings manually if the link cannot do so.
| System | Where to check permissions |
|---|---|
| Windows | Microphone privacy settings; allow microphone access and access for desktop apps. |
| macOS | System Settings → Privacy & Security → Microphone; allow VokeLine. |
| Linux | System sound settings and your desktop environment's device permissions; confirm the selected input works. |
What happens: The test detects sound and the input device has no unavailable warning. File transcription does not need a microphone; for that task, go straight to Transcribing audio files.
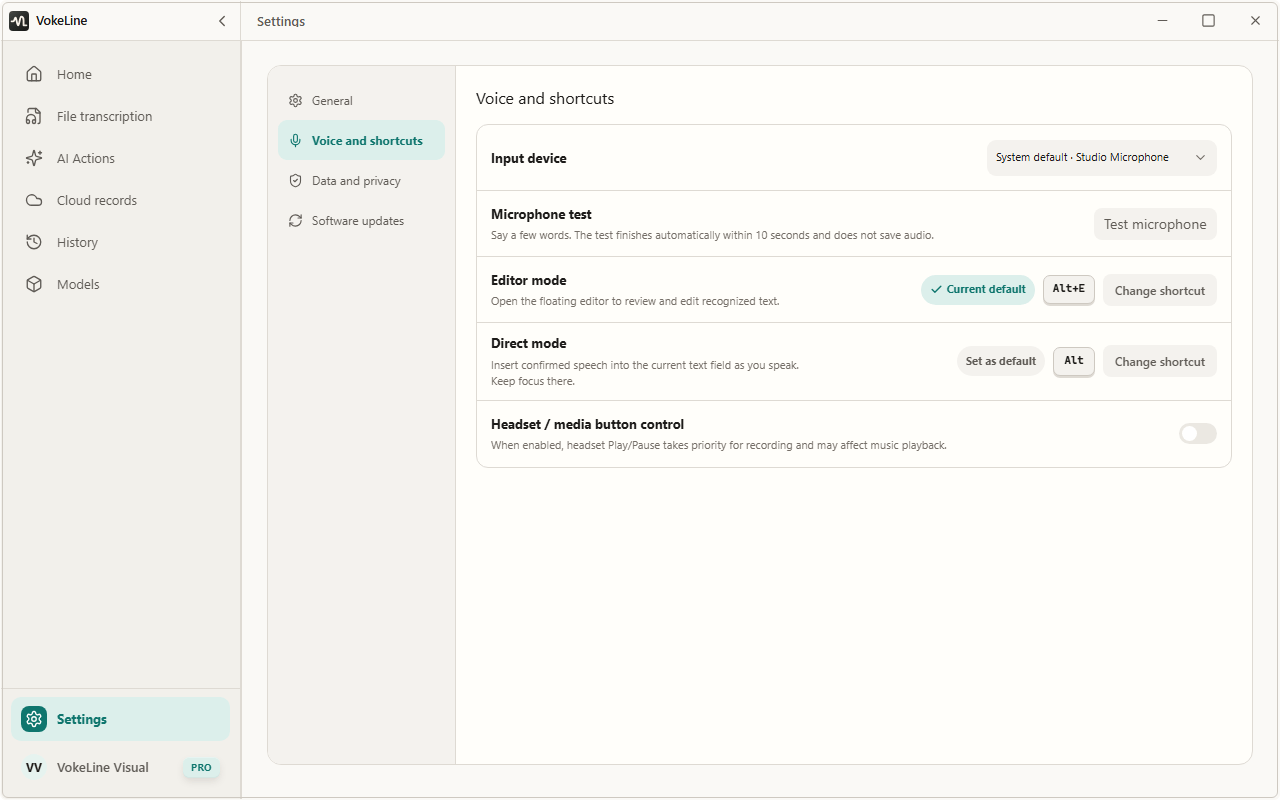
Voice and shortcuts contains the microphone and keyboard controls; Test microphone checks the selected input.
Create your first transcript
Where and what you need: Use the microphone button on Home after completing the preparation above. In Settings → Voice and shortcuts, make Editor mode the default first.
- Return to Home, check that the button says it uses Editor mode, and select the microphone button.
- Wait for recording to become ready, then speak a short sentence clearly. Recognized text appears in the floating editor.
- Use the recording control to finish and wait for the text to settle. Do not repeatedly restart while it is being finalized.
- Review and edit the text, select Copy, and paste it into your destination app.
What happens: You have text you can edit and copy. Editor mode does not insert it into another app automatically. To write into an active text field, use Direct mode.
With Save local records enabled, you can find the completed entry in local history. Completing a recording does not automatically save it to cloud records.
Basic settings
Where to start: Settings → General.
- Choose an interface language and a light, dark, or system theme.
- Set launch at system sign-in and Always on top as needed. Starting in the background when you sign in does not start a recording.
- If the floating window is off-screen, use Restore position under Floating window position.
- To stop saving new transcripts, turn off “Save local records” in Data and privacy. Existing records remain. Recording and file-transcription sessions, audio duration, and output character counts still contribute to usage statistics.
What happens: Your choices take effect. Shortcuts, microphone selection, and AI output language have their own controls; see Using features. The difference between disabling recording history and deleting it is explained in Account and data.
Update and reopen the app
Update entry point: Settings → Software updates. Connect to the internet, check the current version and update result, and follow the options offered. If there is no update, keep using your current version. Update support depends on the platform and installation method shown in the app.
Closing the main window may leave VokeLine running in the background. Reopen it from the VokeLine system-tray or menu-bar menu. You can also open the floating toolbar there or with a working voice shortcut.
To quit completely, finish recording or transcription first, then choose Quit from the tray or menu-bar menu. Installed models, settings, and saved records remain for your next launch. See Stopping, collapsing, hiding, and quitting for the differences.